It seemed easier to do this in a blog so that I could put all the
pictures together and hopefully answer any questions all in one place as
you are reading through it!
So - it all started with Pinterest and this pin from my cousin Kelly...

Now, I've been eying Christmas topiary's like this for YEARS but they are crazy expensive so, I've never had any. But this... THIS seemed do-able. Even though the only directions are "wrap garland around a tomato cage" which is pretty vague for me (and really super impressive I even knew what a tomato cage was!)
So... here is how I spent a full hour and a half of my Sunday afternoon - scared it might not work because it hasn't for others but determined to have these Christmas tree topiary things I've always wanted!
Ready? Because I'm here to show you how it's done!

Step one - get these (they are tomato cages!) I bought mine on Ebay for about $2 a piece.

Step 2 - buy the adjustable/movable/whatever you want to call it "real looking" garland. I got mine at WalMart - $2 for 9 feet. *each tree took 5 bundles of garland (45 feet)
And I bought these cute ball things ($3 also WalMart) for the top of each one.

Step 3 - open up the garland and pull apart/open each piece so it's stretched out (trust me, I did the first tree without doing this first and it took a lot longer and was harder to open the pieces after they were on the tomato cage. So... just do it!

Step 4 - start wrapping. I started at the top. This is how it looks after 1 strand of 9 foot garland.

Still step 4 - after 2 strands of garland

Yep, step 4 for after 3 sets of 9 foot garland

And still step 4... this time after 4 strands. (and adding the ball thing on top!) I was going to leave it with 4 strands but wanted it fuller and completely to the bottom so I added a 5th strand.

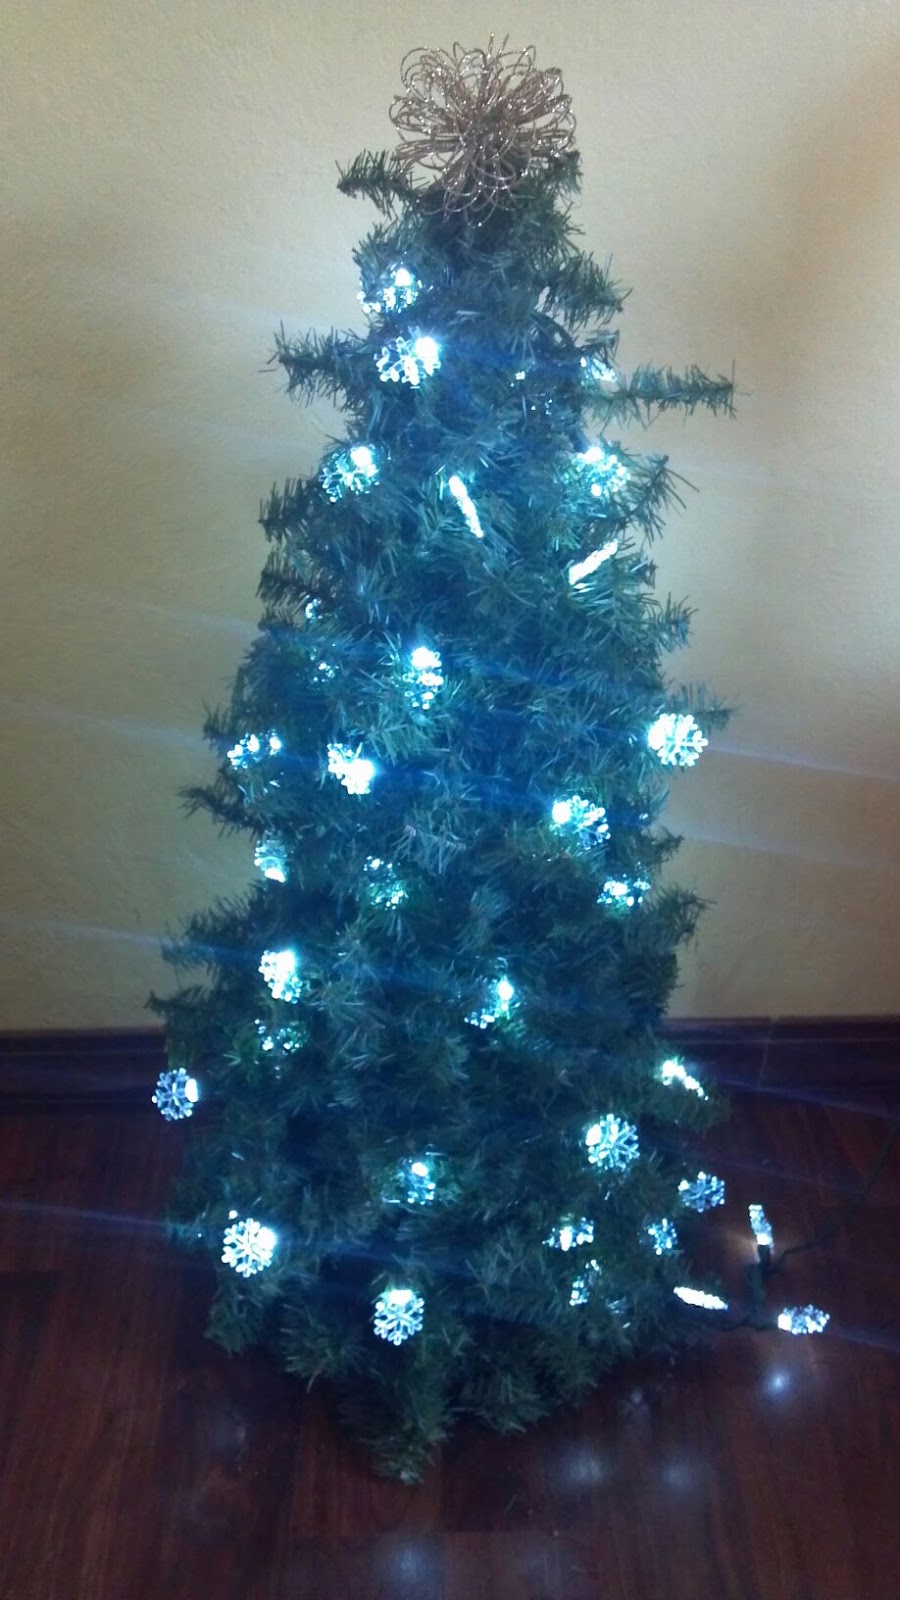
Step 5 - add Lights (totally optional!)

I did regular lights on the tree on the left - which has only 4 strands of the garland and the cute snowflake lights that Allison and I liked on the tree on the right which has all 5 strands of garland.
Now... almost done but something is still missing.....

Step 6 - The POTS!
I had these in my garage and bought spray paint ($5 a can but I only needed one to do both)

and then.... TA DA!!!!!!!
*yes the paint was still dry because I have NO patience to wait for paint to dry! LOL
Which brings me to where we are now...

So for under $35 I have 2 beautiful trees!! (Oh, the lights I had on hand but those are really cheap if you get the plain ones or don't use any!)
***I also placed a landscaping brick in the bottom of each of the pots so that they wouldn't blow over! The trees are pretty heavy but the extra balance and weight seemed like a good idea!
Ok - you're turn!
I need to get Eric to OK a Walmart trip...18 feet of that garland was $50 when I was looking!
ReplyDelete